Page 1 of 1
Magnet charger.
Posted: Sat Feb 02, 2019 11:15 pm
by Jeepbone1
I know this topic has been brought up many times before but it hasn't really been explained in its entirety. Here's a link to my Facebook post where I showed everything from start to finish. The charger was relatively inexpensive to build and took the magnets from almost nothing to comfortably holding the weight of a cast piston.
https://www.facebook.com/groups/Fordmod ... 262035548/
Brad
Re: Magnet charger.
Posted: Sun Feb 03, 2019 9:18 am
by Jeepbone1
For those who don't do Facebook.
Re: Magnet charger.
Posted: Sun Feb 03, 2019 9:20 am
by Jeepbone1
More pictures.
Re: Magnet charger.
Posted: Mon Feb 04, 2019 3:54 am
by infotfordnl
Brad
how many turns did you use?
I was told 12 rounds is good and to use a 12 volt battery, figger out what is N and S on the magnets and on the windings with a compas
also bussy with this project now.
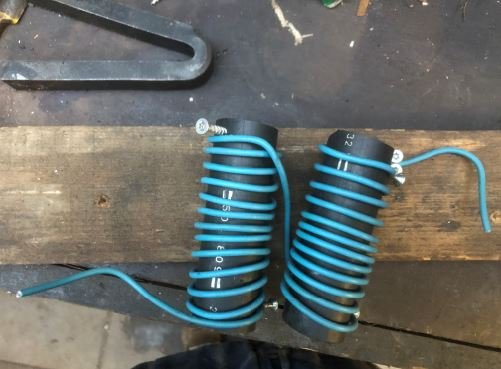
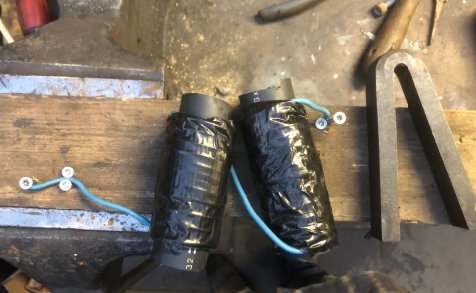
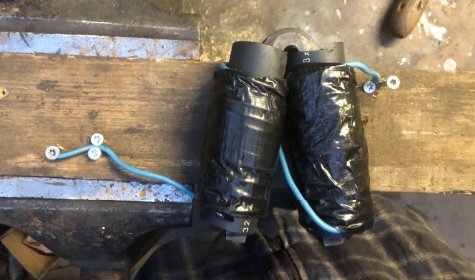
See pictures below, very simple way to do....
by installing put south by south and North by North, I use a compas to do it correct
Bert

- Recharcher-magnet-3.jpg (34.91 KiB) Viewed 7346 times

- Recharcher-magnet-1.jpg (33.57 KiB) Viewed 7346 times

- Recharcher-magnet-2.jpg (32.74 KiB) Viewed 7346 times
Re: Magnet charger.
Posted: Mon Feb 04, 2019 7:30 am
by Mark Osterman
I made two when I charged my magnets. The first version was simply wires wrapped around a single iron rod. The end of the rod was placed in contact with one end of the magnet and zapped a few times with a single 12 volt battery. It worked well but took a few zaps.
The second vesion I made was wire wrapped around two separate sections of copper tubing shown below. This allowed inserting both ends of the magnets into the tubing. I hooked this up to two 12 volt batteries. It charged much faster.
Re: Magnet charger.
Posted: Mon Feb 04, 2019 10:05 am
by Jeepbone1
infotfordnl wrote: ↑Mon Feb 04, 2019 3:54 am
Brad
how many turns did you use?
I was told 12 rounds is good and to use a 12 volt battery, figger out what is N and S on the magnets and on the windings with a compas
also bussy with this project now.
See pictures below, very simple way to do....
by installing put south by south and North by North, I use a compas to do it correct
Bert
Recharcher-magnet-3.jpg
Recharcher-magnet-1.jpg
Recharcher-magnet-2.jpg
We used 36 volts in series (3 12v car batteries) and added a momentary switch. Much easer and safer that way. I don't remember how many turns we made on each layer but we did make 3 layers of wires.
Brad
Re: Magnet charger.
Posted: Mon Feb 04, 2019 10:06 am
by mike zahorik
There must be many different types of home made magnet chargers and most of them work fine. I think the key is that the battery current that passes thru the coils should be an abrupt change, that is on and off sharply. This causes the most magnetic flux to flow. Here is a hand held charger I made that will work for magnets that are still on the flywheel. It is just a bent 1/2 steel rod that is ground on the ends to mate with the magnet ends. With two coils wound on the legs. Seems to work well. Mike
Re: Magnet charger.
Posted: Mon Feb 04, 2019 10:11 am
by George Andreasen
I built a magnet charger for use on my old flywheel engine magnetos. I used 1 1/4" mild steel round stock for the cores, covered with two slip on cardboard tubes. The tubes were wrapped with five pounds EACH of 17 gauge magnet wire, taped, then connected in series with a heavy diode (this is a plug in, 110 vac unit) , push button switch and a 10 amp fuse. Make SURE that the switch is heavy enough to stand large DC current. It works quite well, in fact turning it on while on my bench makes every bolt, washer and metal particle within 18" stand at attention.
My construction is overkill though. The unit built by the OP is sufficient, but I want to clarify something: It is NOT necessary to worry about which pole is N or S. Just suspend the magnet by a stout cord or wire and hit the switch. The magnet will automatically turn and seek the proper polarity. Just lower it on to the poles and start your recharging sequence.
Re: Magnet charger.
Posted: Mon Feb 04, 2019 11:56 am
by RajoRacer
Another option for charging - I was assisted in the build of this one based on a booklet put out by a fellow by the name of Gingery, I believe. AC current with a full wave bridge rectifier, whatever the heck that is - like I stated - I had assistance (electrical engineer!)
Re: Magnet charger.
Posted: Mon Feb 04, 2019 10:00 pm
by RBrooks
Nice magnet charger Brad!
Re: Magnet charger.
Posted: Mon Feb 04, 2019 10:02 pm
by Bob McDaniel
mike zahorik wrote: ↑Mon Feb 04, 2019 10:06 am
There must be many different types of home made magnet chargers and most of them work fine. I think the key is that the battery current that passes thru the coils should be an abrupt change, that is on and off sharply. This causes the most magnetic flux to flow. Here is a hand held charger I made that will work for magnets that are still on the flywheel. It is just a bent 1/2 steel rod that is ground on the ends to mate with the magnet ends. With two coils wound on the legs. Seems to work well. Mike
Mike,
When you charge the magnets on the flywheel with this charger, do you charge them one at a time with or without the metal keepers on the ends?
Re: Magnet charger.
Posted: Mon Feb 04, 2019 10:18 pm
by Steve Jelf
There's quite a variety of methods, all of them essentially the same. The traditional test is for a magnet to hold a cast iron piston (about two pounds), so if I can get them to four pounds or more I call it good.
Re: Magnet charger.
Posted: Tue Feb 05, 2019 11:14 am
by mike zahorik
Bob, It works with the magneto assembled. Here is a pirture. THen to test the magnet we tipped the engine on it's side, via the engine stand and placed the 3# weight on it. Mike