Page 1 of 1
Late '26 Touring upholstery
Posted: Mon Mar 01, 2021 8:28 pm
by Mustang1964s
I was able to get the sheet metal work done by a professional. A fellow club member.
The car looks great.
The upholstery kit from Classique looks great. The car was converted to a white interior before my father-in-law became caretaker back in '63.
So back to white it goes.
Here are the new springs.
Front and rear.
Since the upholstery is white, I painted the springs white.
No one will see the seat backs and only a few will see under the seat cushions.
I am very nervous attempting this adventure, but giving it a shot.
Does someone have a pictures or diagrams how to attach the upholstery to the doors?
The kick panel and hip panel seem to be self explanatory.
The doors are a horse of a different color.
I will post pictures as I go.
Re: Late '26 Touring upholstery
Posted: Mon Mar 01, 2021 9:27 pm
by Norman Kling
I think you have the seat back spring upside down. The curved corners go to the top.
Norm
Re: Late '26 Touring upholstery
Posted: Mon Mar 01, 2021 10:38 pm
by Mustang1964s
Lol
Now that you mentioned it. It is!
That’s what I get for just setting them in.
Re: Late '26 Touring upholstery
Posted: Mon Mar 01, 2021 10:50 pm
by Allan
I have a friend in Spokane with a black 20's tourer that has white upholstery. It has been dubbed the Oreo!
Allan from down under.
Re: Late '26 Touring upholstery
Posted: Tue Mar 02, 2021 8:50 am
by DanTreace
Seat upholstery is fairly easy, make a simple plywood base and 2x4 stringer, with two long all-thread rod at each end to compress the spring inverted over the upholstery. Then fold in the crimp channel. Rear hip pads go in first, then hang the rear back spring, with simple looped strips of material, positioned over the finished seat. The rear backrest upholstery then is fitted over the backrest spring.
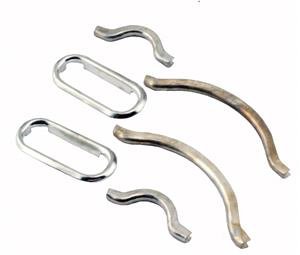
Door panel cardboards are originally held with ring nails, with flat round heads. These are driven into sockets placed at the holes located around the perimeter of the doors.
Some cutting needed at the slot for the handle, a paper pattern helps, or use chalk impression of the handle swing. Metal bezels are fitted to the cut slot to prevent handle wear and at the latch too (unless the repro door cardboard is vinyl covered and has stitched hem).
Re: Late '26 Touring upholstery
Posted: Tue Mar 02, 2021 1:12 pm
by Mopar_man
Please post lots of pictures. Some of us are about to do the same thing and It's helpful to see. Looks like you're off to a good start.
Re: Late '26 Touring upholstery
Posted: Tue Mar 02, 2021 3:31 pm
by Mikey1968
The way I did my 26 Touring doors is as follows. I had old warped aftermarket black cardboard that was held in with small Phillips head screws and washers screwed into the original socket clips. I removed the screws and left the sockets in place and stored the warped cardboard elsewhere. Then, I took a small Phillips head screw driver and, while holding the new panel, I would carefully align and mark the top corner with the point. You could see and feel about where the socket was. I ensured I was close using a flashlight and double checking my small prick mark from the screw driver. Next, I used a leather punch (the kind you squeeze like pliers) and punched a small hole. I reused the small screws and washer running it back into the socket. I'd then work my way around as described screwing in each screw until all done. Then, I would unscrew one screw, grab a ringed nail and drive it in using a plastic mallet. I did this one at a time until all nailed in.
I had a few missing original sockets so used the plastic aftermarket ones on.
It was time consuming but it turned out looking pretty good. If your prick mark was off, I'd adjust where I actually punched the hole.
Was not aware there is supposed to be trim at the door handle slots.
Re: Late '26 Touring upholstery
Posted: Tue Mar 02, 2021 3:41 pm
by Mikey1968
Re: Late '26 Touring upholstery
Posted: Tue Mar 02, 2021 4:46 pm
by Jonah D'Avella
Did you buy a top as well?
Re: Late '26 Touring upholstery
Posted: Wed Mar 03, 2021 5:48 pm
by Jonah D'Avella
If so, did you get it from clasque?
Re: Late '26 Touring upholstery
Posted: Sat Mar 06, 2021 4:08 pm
by Mustang1964s
yes I ordered the top as well.
They did the roll up rear panel of the top for me as well.
Now for the next phase of the project.
I was able to install the front hip panels.
Just went to Harbor Freight and picked up some plastic tools.
Went to work to widen the channels just a touch.
They slipped in with the expected amount of force.
Used the big fat tacks at the bottom.
My question is the rear 1/4 round toe kick and the back hip panel.
Am I missing some wood here?
The 1/4 round panel is just held in with the tacks or nails along the door?
Here is the panels just sitting in.
Re: Late '26 Touring upholstery
Posted: Sat Mar 06, 2021 11:09 pm
by DanTreace
Here's two pics: one is of an original rear seat cardboard and rear hip pad.
The new pic is what I did on my touring .
- touring rear seat .jpg (69.5 KiB) Viewed 7177 times
Re: Late '26 Touring upholstery
Posted: Tue Mar 09, 2021 10:01 pm
by Mustang1964s
I am looking at the door panels.
Pretty straight forward.
The question is the top edge.
Will it be ok just leave it tucked under the lip.
What is the opinion of the folks about putting a slight amount of weather strip sealer just along the top?
Would it prevent of any chance of coming from the loose or bowing.
This a driver and be exposed to the weather.
Here is a pic before I attach it.
With luck I will have the door panels nailed tomorrow night.
Re: Late '26 Touring upholstery
Posted: Tue Mar 09, 2021 10:33 pm
by Mustang1964s
One more question.
Do I need to get the trim around the door latch?
https://snydersantiqueauto.com/ProductD ... dles-parts
Looking at Dan's post, it seems that it should be.
- T_45320.jpg (7.9 KiB) Viewed 7090 times
Re: Late '26 Touring upholstery
Posted: Wed Mar 10, 2021 8:03 am
by DanTreace
Steve
Your fit at top is fine. Under that slight lip, that will prevent moisture. Of course if you leave it in the rain all the time the door panels will warp in a few months. Dry off the upholstery if caught in the rain with top down. Any sealant at the top edge could be visible.
As for latch trim, your new panels have stitched seams, no real need to add the metal crescent. Those were factory for the pressed in grain black cardboard used, and the metal crescents were factory crimped to the exposed edge of the cardboard panel as added wear protection to keep a raw edge of cardboard from fraying. Your panels are more fancy than stock, with added layer of vinyl

Re: Late '26 Touring upholstery
Posted: Fri Mar 12, 2021 2:03 pm
by Mustang1964s
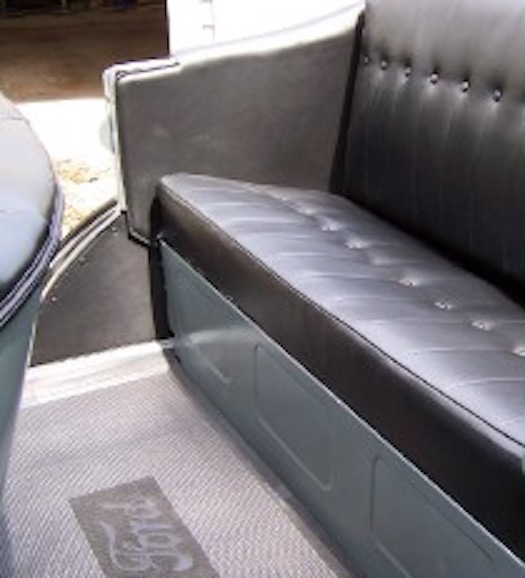
Here are some pictures of the rear toe kick and rear hip.
My current question is do I pull the over hang tight then tack it down or leave it fit just snug?
Toe Kick and Rear Hip
Just rear hip
Over lap. How tight do I pull this?
Re: Late '26 Touring upholstery
Posted: Fri Mar 12, 2021 3:12 pm
by DanTreace
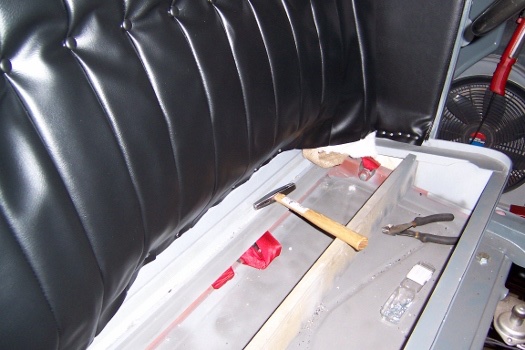
Looks pretty good to me. Would try to remove the wrinkles with a tad of cotton batting under that rear section, the back rest upholstery will cover that area anyway, but just to be sure those wrinkles are covered too.
Original 1926sport touring, new, backrest showing the hip pad, pull nice over the top of the body armrest.
Install on my '27, showing the thin padding on that vinyl wrap over the arm rest. If you look at my finished photo, in this thread 3/6 @ 11:09, the rear hip pad is smooth and pulled tight, without wrinkles, over the armrest section of the rear body tack wood.
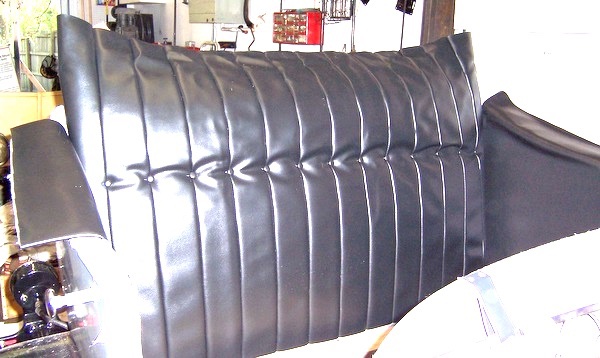
- 26 tour rear install .jpg (82.88 KiB) Viewed 6939 times
Re: Late '26 Touring upholstery
Posted: Fri Mar 12, 2021 3:23 pm
by Mustang1964s
Dan,
I was going to tack the hip panels in.
Or should I wait until I am read to do the back rest?
I started the tacking.
Is this tack distance too close?
Re: Late '26 Touring upholstery
Posted: Fri Mar 12, 2021 6:24 pm
by DanTreace
Just add enough tacks to keep the vinyl in line, just don't stretched too snug. The vinyl should have a thin padding layer under? Mine did. That keeps the line smooth like a smooth wrap over. Yours is looking good.
Just reminder, your top cover will also be layered over this vinyl. So not too many tacks, as your top cover (gypsy curtain) (2nd layer) will be tacked in the wood there too , and then the Hidem welt will go all around the edge of the top cover, so you will have two layers under the Hidem. Have a hunk of Hidem welt for 'gage' of how the tacks run, you will want the Hidem to just barely go over the metal edge, but allow hiding the highest placed tack, you only have so much tack height to work with.
For me, having gaps allows more tacks for the 2nd layer, so tacks won't hit tacks. I also have used a staple gun, and that helps keep a straight line on upholstery to the body metal. Staples ok for that line. But tacks are used on the top cover, as tack heads are better to resist the pull a top cover that will get buffered with wind at speed.
Plus as gun nose holds the gap open for the Hidem welt, and the thinner staples can clear tack heads under (you won't see the tack heads easy when placing the Hidem).
Looks to me you are having fun! And that white interior will be classy too

Re: Late '26 Touring upholstery
Posted: Sun Mar 14, 2021 2:30 pm
by Mustang1964s
Side and door panels installed, except the front kick panels.
It's been an adventure, I think the hard part is about to come up.
Let me know what you think.
Trim around the latch.
Here are the rest.
Re: Late '26 Touring upholstery
Posted: Sun Mar 14, 2021 5:43 pm
by John Codman
When I purchased my '27 touring car the back seat upholstery had been redone. The pleats had buttons. Th front seats had not been done and the seats that I presume to have been originals (they were really bad) did not have buttons. I'm guessing that the seats would have matched. Does anyone here know for sure whether a late '27 (March production) would have had buttons or not? For the record - we redid the fronts without buttons.
Re: Late '26 Touring upholstery
Posted: Sun Mar 14, 2021 6:45 pm
by DanTreace
Bruce's C-D encyclopedia states '26-'27 open cars came with or without buttons on the vertical pleats.
Ones I have seen original are later, '27s with Vaporizer carbs, and pleats are without buttons. The famous 15th Million is buttonless.
Re: Late '26 Touring upholstery
Posted: Sun Mar 14, 2021 8:59 pm
by blgitn
This is all great info, thanks!
I'm interested in a seamless hip pad / backrest in my 27 Roadster; will a 23-5 upholstery kit fit a 26/7?
R/ Roger.
Re: Late '26 Touring upholstery
Posted: Sun Mar 14, 2021 10:10 pm
by DanTreace
Better to have an upholsterer do a special covering that uses some type of cardboard or reinforcement at the arm rest channels and lower edges where there is only a bit of tack wood.
The '23-'25 kit backrest wouldn't fit at the body upper edges where metal channels hold a cardboard panel, there is no wood there like a '23-'25 body.
Plus the '26-'27 seat is wider and lower and angled more at the metal frame. The one-piece wrap of the '23-'25 would be too tight to cover into the corners.
Re: Late '26 Touring upholstery
Posted: Mon Mar 15, 2021 10:36 am
by Mustang1964s
The pinch channels at the top of the front and rear hip pads, I used an Harbor freight plastic tools.
The are cheep.
They worked great to widen the channel just a bit to slip the pads in.
Then I used them to cover the channel and hammered the channel shut.
Now I am working on the front cushion.
The youtube video is great. (except for the people standing in front of the camera) I watched it several times then again when I started.
Now need to get a couple of 2x4's and all thread.
Pictures will be coming soon.
Re: Late '26 Touring upholstery
Posted: Mon Mar 22, 2021 8:48 am
by Mustang1964s
The front seat cushion is done.
This one took a while. Learned a lot.
The rear should go quicker.
Re: Late '26 Touring upholstery
Posted: Sun Mar 28, 2021 9:41 pm
by Mustang1964s
The rear cushion is done. I am hoping the sun can do a little magic on it.
My question is what gauge staple should I use for the seat backs?
I tried to using my hand staplers. The first one just put a dent in the wood and bent the staple.
The second one actually sent the staple in but not far.
I will be looking for a air stapler to do this work.
Any recommendations on an air stapler?
Re: Late '26 Touring upholstery
Posted: Mon Mar 29, 2021 9:29 am
by DanTreace
Steve
That cushion looks swell! Good work on that.
As for the backrest, still think best to use tacks and upholster tack hammer. You will be positioning and pulling tacks to get alignments, so using a staple gun makes tough work of pulling a staple. The 2 leg staple leaves tears in the vinyl.
Start at the lower base of the backrest, then pull the cover over the hanging backrest spring, and pull tight over the tack stip.
Once you tack in place, you can always use the staple gun for finish off work. And the staple gun is very handy to place the Hidem welting, as the nose fits into the split welting!
My staple gun is the cheap Harbor Freight, does the job, 3/8" long staples, stainless steel ones to keep from rusting, more important to use stainless on the top covering too.
- 100_2492 (525x350).jpg (92.28 KiB) Viewed 6443 times
Re: Late '26 Touring upholstery
Posted: Mon Mar 29, 2021 9:34 pm
by Mustang1964s
Tonight I was trying to place figure out the spring placement before I starting to cover them up.
The rear spring seem to fit right in.
My question is the front seat springs.
Do they need to be bent to match the sheet metal?
Or should I put some support behind the spring to keep them from collapsing into the sheet metal?
Here is the front:
Here is the rear, I think the placement seems about right.
Or just a bit lower.
Re: Late '26 Touring upholstery
Posted: Mon Mar 29, 2021 10:02 pm
by DanTreace
The placement for the front seems fine, the spring will conform to the curve of the backrest body panel. Hang the spring with the seat cushion in place, that will show where the spring should hang on the lower part. Looking good!
Re: Late '26 Touring upholstery
Posted: Tue Mar 30, 2021 8:08 am
by Mustang1964s
Dan,
In your picture there seems to be a brace or a spacer going up the center.
My car seems to be missing that spacer or brace.
Now I am wondering if I need to put that brace/spacer.
Since the car has been painted, make it out of a wood.
Let me know what you think.
Steve
Re: Late '26 Touring upholstery
Posted: Tue Mar 30, 2021 9:06 am
by DanTreace
Steve
Those are the factory pieces for support to the seat back and spring. 3 pieces.
45044X- reinforcement(front seat back panel). that is the angled steel piece about 8 inches long bolted to the top of the panel thru the tack wood.
45256X - strip (seat back support) a steel strip bolted beneath the angled steel piece at top and bolted to lower seat wood tack strip ,(stove bolts) gives support to the backrest spring.
8283BX- anti-rattle (front seat back panel)- narrow strip of cardboard door panel material, acts as deadener and fits between the 4526X and the rear panel.
You could add a piece of hard maple of something, but keep the profile low, or your backrest spring will be too forward.
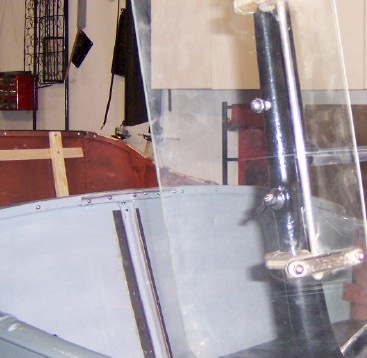
- front stiffener forum.jpg (56.47 KiB) Viewed 6344 times
p.s. part #'s and descriptions from Ford Price List of Body Parts, March 1927. Parts aren't available as reproductions.
Re: Late '26 Touring upholstery
Posted: Wed Mar 31, 2021 9:22 pm
by Mustang1964s
Sorry for all the questions. I don't see myself going back in to this again for a loooooong time.
I am planning on building a brace for the center front.
My questions is where do the corners go.
Up high and tight?
Down a little?.
In front of the tack rail?
Here are a couple of pictures.
Let me know how close I am getting.
A couple of different locations.
Re: Late '26 Touring upholstery
Posted: Sat Apr 10, 2021 3:47 pm
by Mustang1964s
I am tackling the rear seat back.
The old seat back had a piece of what looks like cheap carpet.
Should it be put on the new springs?
I have installed new wood. The three runners were missing from under the old seat back.
I have an alignment questions.
The burlap is hogged tied to the front of the seat springs.
The flaps on the upholstery should the align up with the springs?
Where should it be hog rings be applied?
I am thinking so.
The bottom of the upholstery aligns up the padding lines up bottom of the springs.
Should the cotton padding also start at this alignment point?
It seems that the cotton padding could hang down just a little past, just take up the gap from the back to the seat.
Here some pictures of the old seat back and what I am currently looking at.
Re: Late '26 Touring upholstery
Posted: Sat Apr 10, 2021 4:14 pm
by Mustang1964s
This how I am thinking the lower corners should be.
Sorry I should have included it in the previous post.
Should the cotton padding be brought down a little bit?