Page 1 of 1
Bad Timing!
Posted: Sat Nov 02, 2024 2:15 am
by ModelTMitch
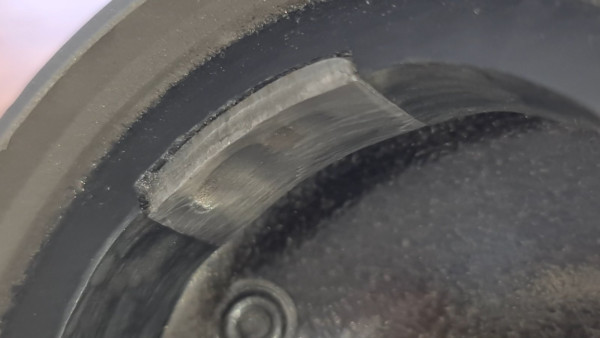
My Model T was running worse than the Mexican economy; and I was at a loss as to why that was. Until I took the timer cover off...
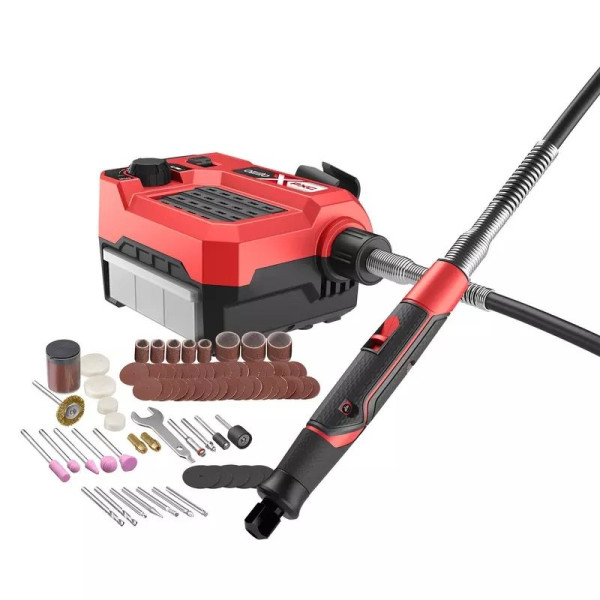
So, using a sanding head on my cheap Bunnings engraver tool, I managed to (by eye) re-surface the contact (and insulator) surfaces inside my roller timer. Now I know this should really be done on a lathe to get a perfectly rounded surface, but as I don't have access to one, this was the next best thing, which I'm pleased to say worked very well!
Enjoy the video... https://www.youtube.com/watch?v=p-PDswiyUTQ

- Worn timer, I've started to smooth out with engraver

- Ozito engraver from Bunnings
Re: Bad Timing!
Posted: Sat Nov 02, 2024 9:03 am
by John.Zibell
Well done. Good video. Hey it worked so a good fix. You might want to try the new production New Day timer. I switched to one and the performance difference is amazing.
Re: Bad Timing!
Posted: Sat Nov 02, 2024 11:18 am
by RajoRacer
I can imagine it was running quite rough with all that bouncing around - if you were closer, I'd turn it out in my timer fixture.
Re: Bad Timing!
Posted: Sat Nov 02, 2024 11:41 am
by Steve Jelf
Wear is universal with mechanical devices, but the flat surface in a New Day is easier to fix than the curved track in a roller timer. Using a lathe, I expect they are equally easy.
Without a lathe:
Re: Bad Timing!
Posted: Sat Nov 02, 2024 1:26 pm
by RajoRacer
I use your method on the New Day timers also, Steve !
Re: Bad Timing!
Posted: Sat Nov 02, 2024 2:30 pm
by RecklessKelly
Being a Toolmaker by trade, I love to see these tools that people come up with.
Re: Bad Timing!
Posted: Sat Nov 02, 2024 4:09 pm
by NealW
Nice video as always Mitch. Thanks for making them. About how many miles did you have on that new timer? It seems like a lot of wear in a year. You may want to consider using red grease instead like shown in Royce's article (link below). He's not the only one who suggests grease instead of oil, and I recall reading once that people used to use Vaseline as grease for the timer back in the day. Perhaps some still do. Royce's article indicates that he's put 1000s of miles on his timers that way. I have used red grease in my Snyder's roller timer and it seems to work well.
https://modeltfordfix.com/repairing-a-m ... ler-timer/
A couple of years ago I resurfaced an original timer using a Dremel and this primitive jig shown in the pictures below. Once set up, you just rotate the timer around and pretty soon you get a surfaces that is smooth and round. Better than you could do by hand but probably not quite as round as the lathe method. However, when you don't have a lathe, you need to be creative.
Neal
Re: Bad Timing!
Posted: Sat Nov 02, 2024 6:44 pm
by ModelTMitch
I've got to say, I'm impressed with the ingenuity in this thread! Henry Ford would be proud! Some of these solutions are so simple its insane!
I'm liking Neal's plywood jig held together with clamps! I may just have to try something like that myself next time.
I did consider the New Day timer, but inevitably, I found the forum posts that are giving it less than stellar reviews!
Re: Bad Timing!
Posted: Sat Nov 02, 2024 7:09 pm
by speedytinc
Also impressed with the "dremel" jig. Ingenuity!
Rajo's fixture is the nuts. Way faster for production timer refurbishing.
As far as the use of New day timers goes, I run one & my Montana buddy runs one. No issues & lots of carefree miles..... IF correctly installed.
Brush contact to timer face should be confirmed. The wrong (taller) cam nut on a thicker timing gear will muck things up. Note a recent post of a "dancing" timer. They gotta run oil free, dry. I, change out the copper brush for carbon. That eliminates a lot of wear. Plus refurbishing old original units for a glass like contact finish. (600 grit wet/dry)
Certainly you have noticed a wide variation of opinions on any topic. I go with what has worked the best for myself.
As far as timers, I have pretty much run em all & seen a lot of failures in many other T's.
Your mileage may vary.
Re: Bad Timing!
Posted: Sat Nov 02, 2024 8:05 pm
by Art M
I just scrapped a dozen roller timers. Without a lathe, I didn't know how to correct the lumpy contact surface. Now I wish I had the old timers back.
About 1600 miles seems to be the life of a roller timer for me. I frequently clean and lube the roller. The roller life has improved in recent years.
Art Mirtes
Re: Bad Timing!
Posted: Sun Nov 03, 2024 5:13 am
by ABoer
To clean the timer I use the following :
And for the roller I use two ball bearings ,till now it works for me
Toon
Re: Bad Timing!
Posted: Tue Nov 05, 2024 6:17 am
by ModelTMitch
This is the best solution I've seen, did you make this jig yourself for your lathe? If so, you could probably make a bit of cash making them, they'd be a hit I reckon!
If I had access to a lathe, I'd definitely buy one from you.
ABoer wrote: ↑Sun Nov 03, 2024 5:13 am
To clean the timer I use the following :IMGP0730.JPGIMGP0731.JPGIMGP1294.JPG
And for the roller I use two ball bearings ,till now it works for me
Toon
Re: Bad Timing!
Posted: Tue Nov 05, 2024 6:15 pm
by Swinz
But Mitch, if you had access to lathe, you could make your own.
ModelTMitch wrote: ↑Tue Nov 05, 2024 6:17 am
This is the best solution I've seen, did you make this jig yourself for your lathe? If so, you could probably make a bit of cash making them, they'd be a hit I reckon!
If I had access to a lathe, I'd definitely buy one from you.
Re: Bad Timing!
Posted: Wed Nov 06, 2024 7:01 am
by Kenny Edmondson
ABoer wrote: ↑Sun Nov 03, 2024 5:13 am
To clean the timer I use the following :IMGP0730.JPGIMGP0731.JPGIMGP1294.JPG
And for the roller I use two ball bearings ,till now it works for me
Toon
Toon, how are the bearings holding up with the balls and races being part of the electrical circuit? I tried using those and they didn’t last very long…
Re: New Day Timer maintenance
Posted: Wed Nov 06, 2024 9:49 am
by Lil Teezy
John, would you be able to elaborate on this statement “I change out the copper brush for carbon”? When I first got my T going Dave Huson told me about using a generator brush in place of the original material on the new day rotor. It seemed too soft to hold the retaining/alignment pin and the car ran well enough anyway, so I have never tried. No problem resurfacing the timer body and have used both the sandpaper disk and chucked in the lathe but Is there a better source for a “carbon” contact or some subtlety to using a generator brush? Thanks, and have fun everybody! -Chris, in Boulder
Re: Bad Timing!
Posted: Wed Nov 06, 2024 10:51 am
by Steve Jelf
Is there a better source for a “carbon” contact or some subtlety to using a generator brush?
Using a generator brush to make a new timer brush does work. Whether it works well depends on how well the new carbon contact emulates the original metal. It needs to fit very well. That sounds simple, but it's not easy to do.
Re: New Day Timer maintenance
Posted: Wed Nov 06, 2024 11:05 am
by speedytinc
Lil Teezy wrote: ↑Wed Nov 06, 2024 9:49 am
John, would you be able to elaborate on this statement “I change out the copper brush for carbon”? When I first got my T going Dave Huson told me about using a generator brush in place of the original material on the new day rotor. It seemed too soft to hold the retaining/alignment pin and the car ran well enough anyway, so I have never tried. No problem resurfacing the timer body and have used both the sandpaper disk and chucked in the lathe but Is there a better source for a “carbon” contact or some subtlety to using a generator brush? Thanks, and have fun everybody! -Chris, in Boulder
I do use a generator brush. Carbon. Cut down T gen brushes mostly. Brush is sanded down to fit the holder closer than the original copper brush, but still move easily.
The one I am running currently has been in 5 years. Rather wear the brush than the timer face. Last I checked, the timer face showed zero wear. Just had to wipe a bit of dust out. I carry a spare brush assembly just in case.
The pin: I cut a short piece of .062" bailing wire. Drill the hole in the brush with a mill/drill press @ high speed. Set with a bit of superglue.
Carefully push in to not break the brush.
I have had the best service from this new-day setup compared to all the other types of timers.
(My experience, your results may vary, but I doubt it.) Those I have set up the same way have had no issues either.
I prefer to refurbish original timer bodies myself in a lathe, but I believe the current repop new-day's are good units.(with a carbon brush conversion.)